Creating a Popup with elementor is quite easy and beneficial to lead generation. Agreed, there are people who would not take the desired action. The ultimate goal of a popup is to give your visitors something else before they exit. A popup is a small form with appears on the screen without prompt. It is usually programmed to come up at certain times or places, depending on the goal
There are different kinds of popups and they are;
- Exit Intent; When the person is trying to click the exit button and leave that page
- Time-based; After spending the desired amount of time on your page
- Scroll-triggered; When they scroll to a particular section of a page
- Click-activated; When a certain action is taken. It could be the click of a button
For this guide, we shall focus on exit intent popup with elementor and how to create it. The exit intent popup is created specifically to show up when a visitor tries to exit the page. There are a plethora of reasons why someone might want to leave, yet an exit intent popup with elementor is like a last attempt at getting their information, hence the need to get it right.
READ ALSO: How to Optimise Pages to Rank for Particular Keyword on SEO
TO begin
Step One: Login to WP
This particular action can be created in your WordPress back-end, hence the need to log in via yoursite.com/wp-admin.
Step Two: Create Popup
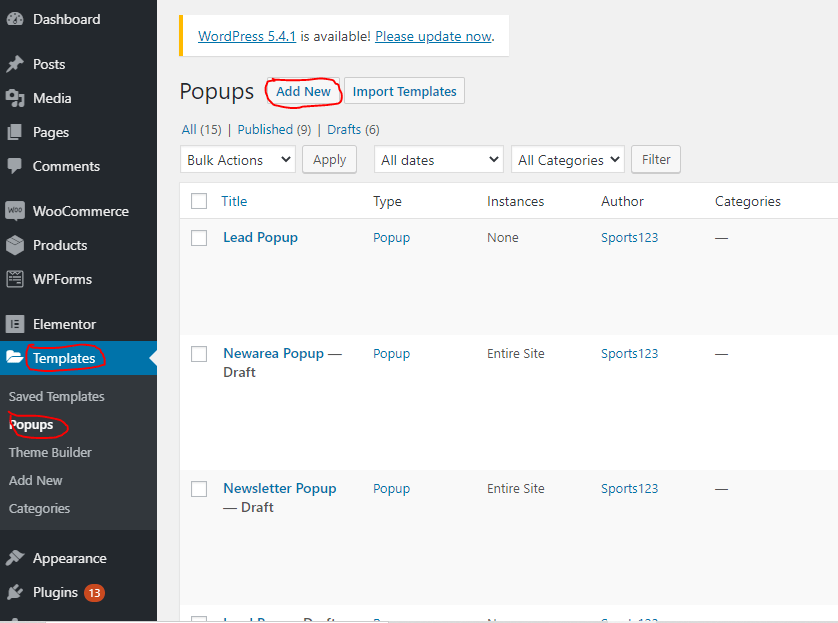
Next, scroll down to ‘Templates’ just below elementor, then click on ‘popups’. Once the next page displays, click on ‘add new’
Next, the template type is automatically on ‘popup’ which is what it should be. Give it a name, then click on ‘create template’.If you have access to the pro templates, you can choose one and click on ‘insert’ If not, you can build one from scratch.
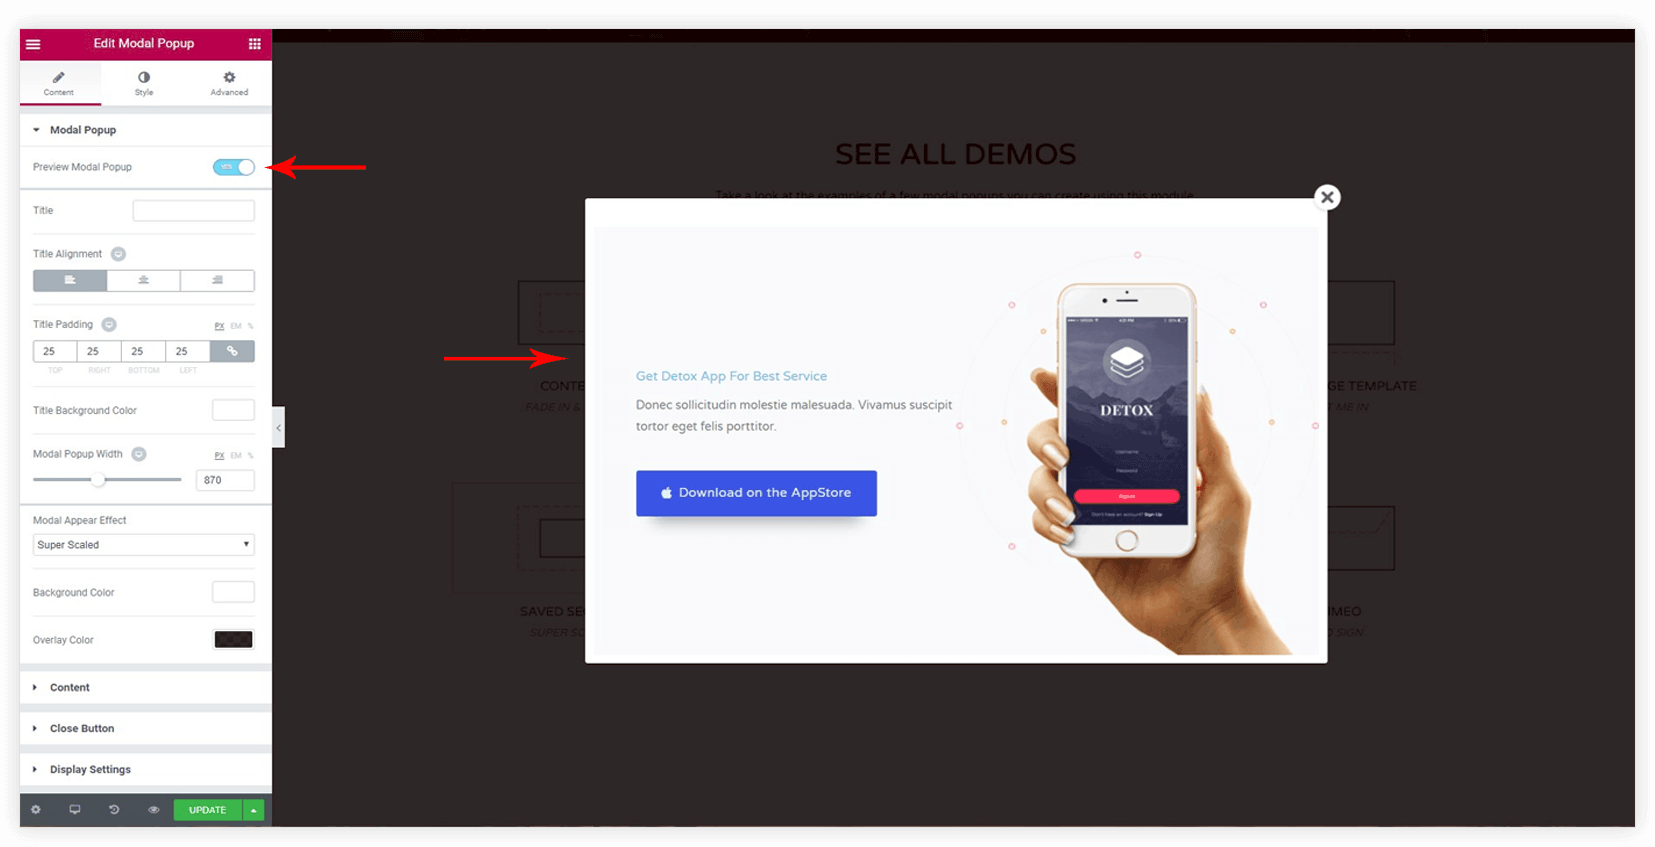
Step Three: Design popup
In an effort to keep up with your brand identity, you are at liberty to create and design this Popup with elementor. You can decide to offer something different from what already exists on your web pages. This is an effort to try one last time to get their details stored in your email list.
Step Four: Publish
After carrying out the design, you are to click on the ‘publish’ button
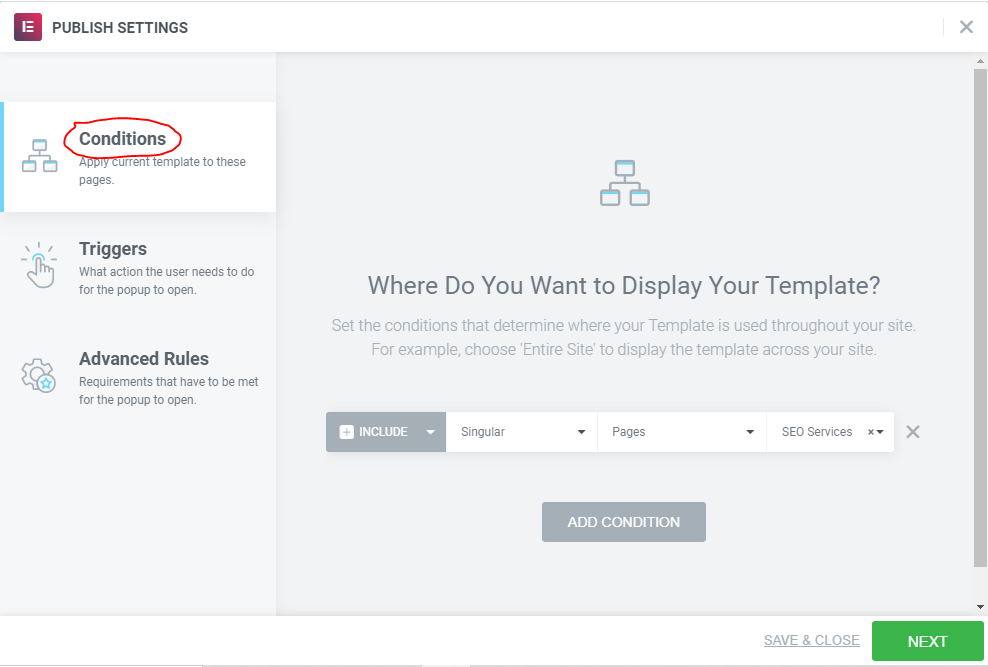
- Conditions: You get to decide where the popup displays on your website. It can be an archive, the front page, all or a particular post and any page(s) of choice.
- Triggers: Here, you get to choose what action would trigger the pop-up to show. Seeing as the goal remains
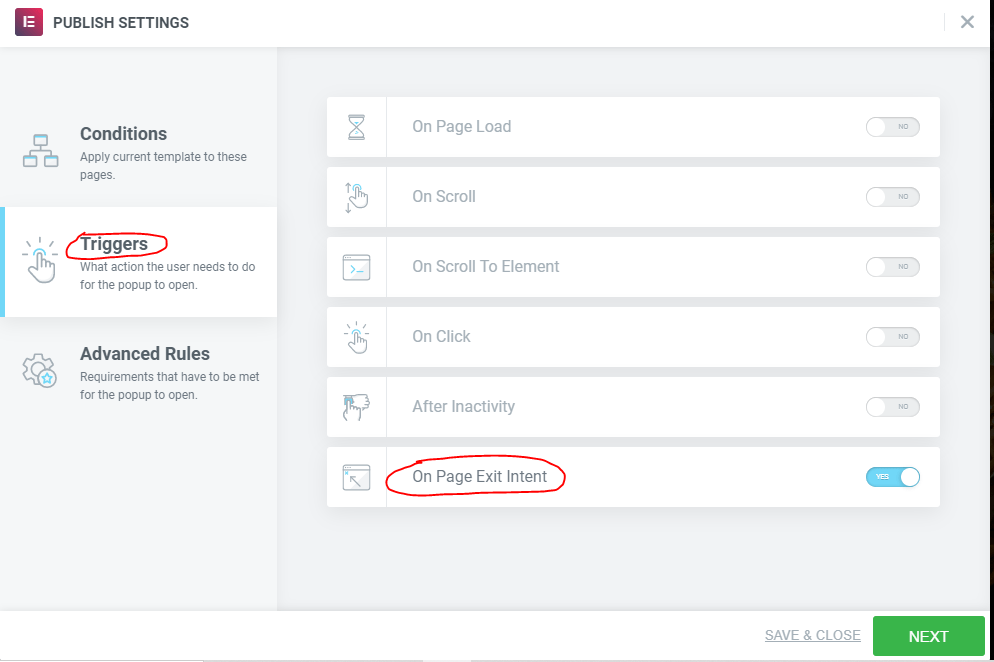
- Advanced Rules: You can also set up further rules to guide the exit intent popup just created and what happens when certain conditions are met.
After this has been done, click on ‘Next’ and your popup is ready to collect the needed details. You can choose more than one corresponding conditions in an effort to get better results.