![]()
The pixel caffeine plugin for WordPress is an alternative to that of Facebook. Recently, the upgrades done by the social media giants has led to slight issues with installing a pixel using their plugin. Not to worry, this guide will show You a simple method of tracking activities on Your website using a pixel
Step One: Create Pixel on Business Manager
Login to Your business manager and ensure to choose the right ad account then click on ‘events manager’
Next, click on ‘connect data sources’ to your left
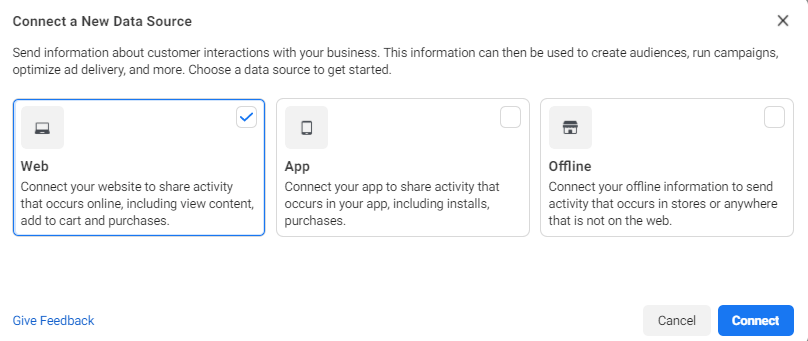
Choose ‘Web’ then click on ‘connect’
Next, choose ‘Facebook Pixel’ and click on ‘connect’ once more
After doing this, You will be asked to name the pixel and enter the website URL. kindly do that to complete the creation process
Next, You would be asked to choose a partner integration, kindly close that prompt.
Step Two: Login to WordPress
After logging in to Your WordPress backend, go to plugins and click on ‘add new’
Search for pixel caffeine, then install and activate.
Next, click on ‘set up now’
Back to Your events manager, kindly copy the pixel ID just created and paste in the space provided for it
READ ALSO: How to interpret your Facebook ad performance and what to improve on
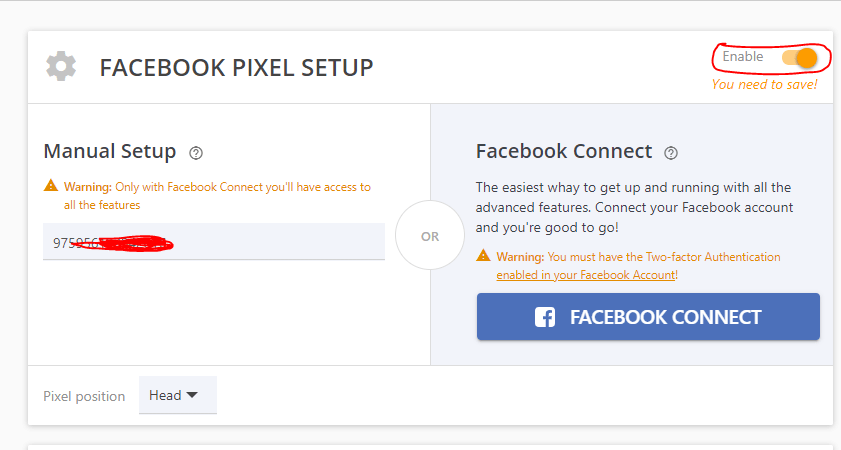
After doing that, make sure to enable the tracking to Your top right. Scroll down and save changes. That’s all!
To confirm if the pixel is now active, go back to events manager and refresh the page.
Also, there is a chrome extension called Facebook Pixel Helper which can be installed on Your chrome browser and used to know websites that have Facebook Pixel on them