As part of the needed skills, knowing how to design a blog page with elementor is a vital aspect retaining the traffic that visit to go through your posts. This also means that they get come back at a later time. A well designed blog page goes a long way to enhance user experience at all levels.
Furthermore, it boosts your online credibility, as people are more likely to engage with your posts if they are informative and the page is well designed.
Before you start to design your blog page with elementor, ensure you have already created a blog page which should be linked to the other pages on your website.
Step One
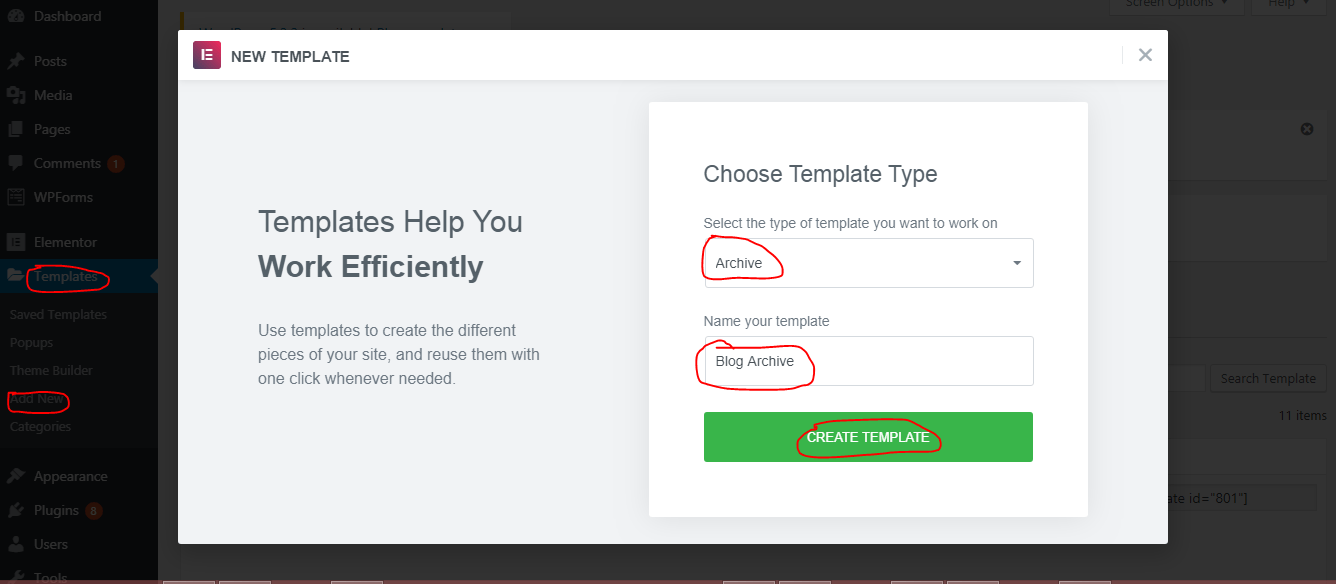
From your WordPress Back-end, click on ‘Templates’ below the ‘Elementor’ icon, then click on ‘Add new’.
Choose ‘Archive’ as the template type, then give it a suitable name, then create template
Step Two
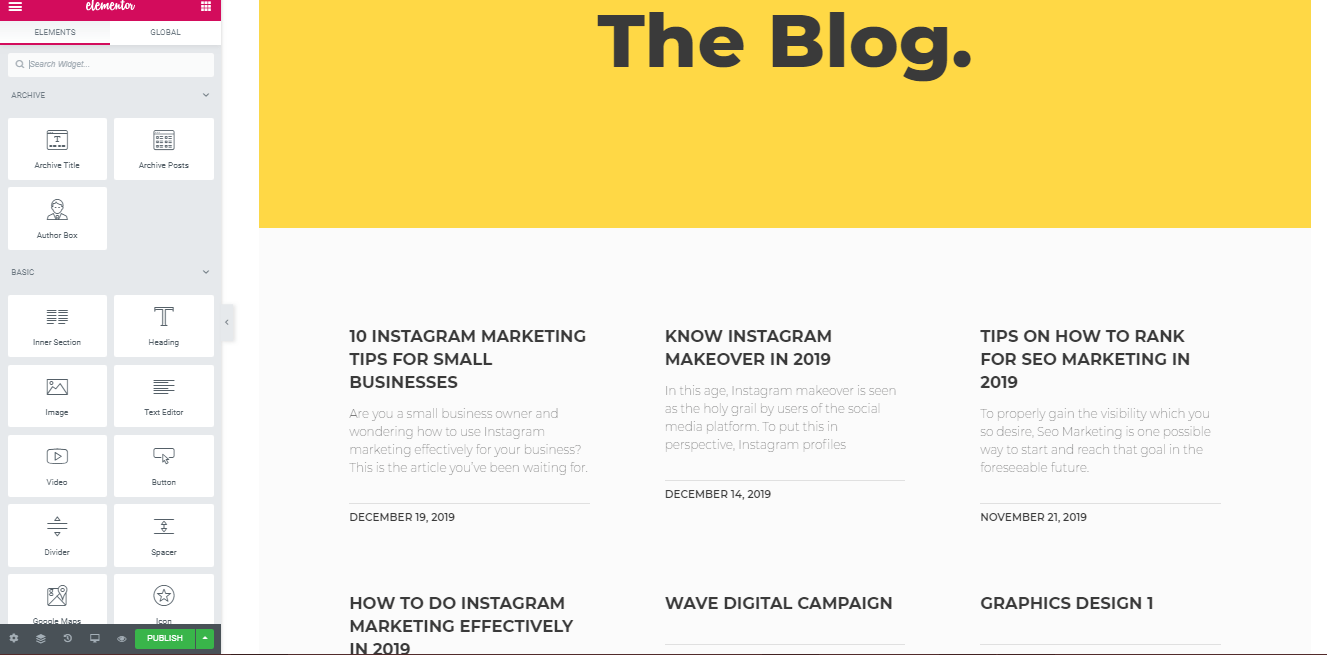
The next step is that you choose any template of choice from the options as displayed. Once this has been done, click on ‘insert’ to begin your design. keep in mind, the need to properly design your blog page to suit the primary colors of your website, as consistency is an important aspect of web design.
The chosen template will give a defined structure to work with, yet it falls on you to properly edit the sections with the right colors, text and creatives to ensure you get that great design on your blog page
READ ALSO: Blog Niches that Make Money: 10 Popular Blog Niche Ideas for Beginners
Step Three
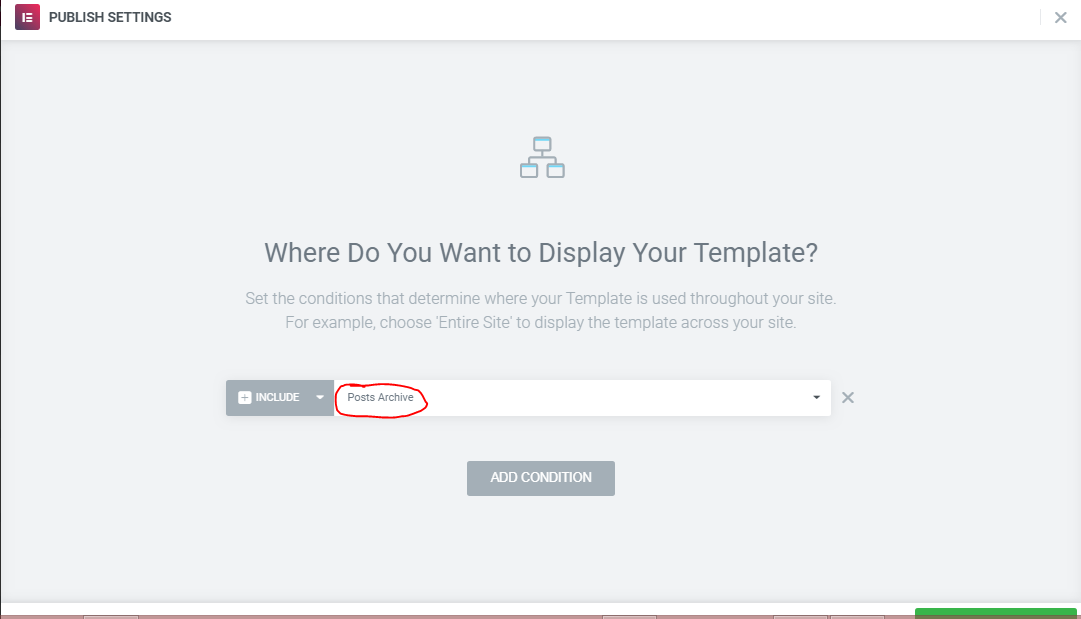
Click on the ‘publish button, and decide the final position of the archive design for your blog. For a professional outlook, it is advised that you choose ‘Post category’ as it places your content in a structures format while adding little details like the date the particular post was made.
Once this has been done, your blog design is ready and adds to the exciting features on your website.


