Having to create a header and footer with elementor is a basic skill which is needed to build a website with said page builder on WordPress. A header does two things
- It helps design and customize the top part of your web pages by giving them a better outlook
- Helps to add extra features like social media icons and phone number to make reaching you that much easier.
How then do you create header and footer on Elementor?
Step One: Log onto your WordPress back end via yoursite.com/wp-admin
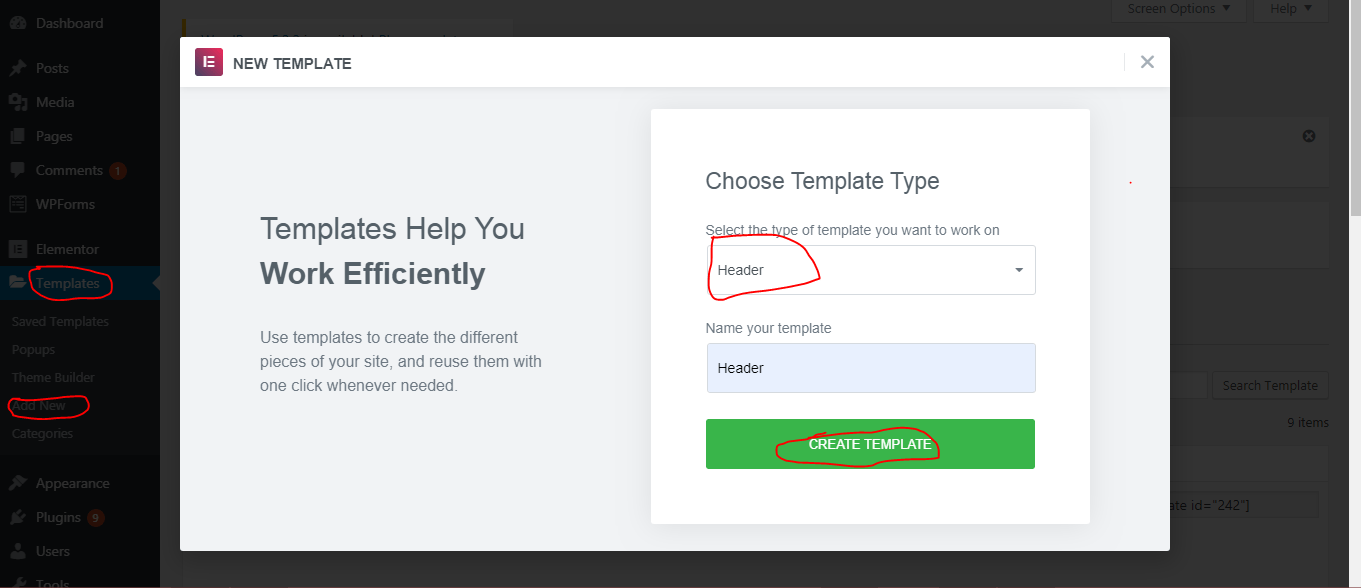
Step Two: Scroll down and click on ‘templates’ below ‘Elementor’
Step Three: Click on ‘Add new’ and select ‘Header’ as the type of template you wish to create. Name your template and click on ‘create template’ 
Step Four: Choose template. There is a plethora you can choose from to create header and footer with elementor. Do well to note that any one you pick would determine how the header or footer would appear at the end.
Each come with unique features and a defined outlook which should be taken into consideration
READ ALSO: How to build a WordPress website or blog in Nigeria
Step Five: Build
Once the preferred header has been chosen, the next step is to customize it as you see fit and add the necessary urls to ensure there is no broken link on your website.
Step Six: Add links
At the top of the header you have chosen, click to the top right to edit the header. Under content, click on the social media Icon you wish to activate and paste the url which leads to that page or account.
Step Seven: Publish and Finish up
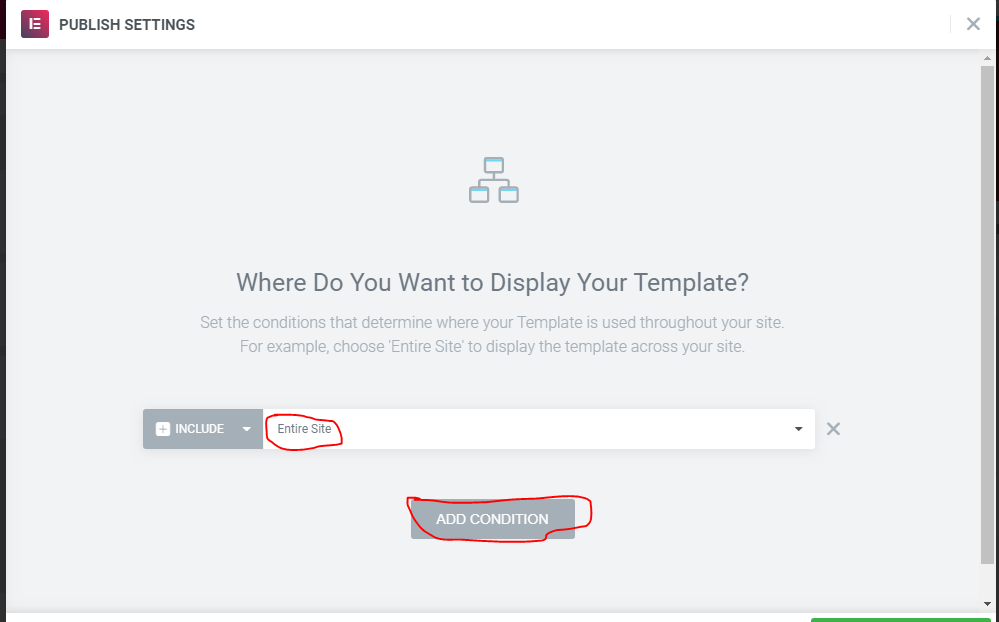
At this stage of adding a header and footer with elementor, you have to decide where you want them to display on. It can be the homepage, or across all pages. Click on the publish button at the bottom once you are done customizing your header,
Next, click on ‘Add Condition’ to choose how it displays on your website
Same process for a footer. While choosing the template from your WordPress back-end, You would choose ‘footer’ instead of ‘header’


