Your lead generation campaign is never complete without email marketing and creating an autoresponder. The huge advantage to this method is that it is a sustainable for the long term and is a great avenue for lead conversion.
While there is a plethora of email marketing platforms, we shall strictly focus on Get-response and how to create an auto-responder in a few quick steps.
Step One: Register
To have access to this platform and its unique feature, kindly go to getresponse.com to register with your name and email address then continue to the website afterwards.
READ ALSO: Lead Generation | A Complete Beginner Guide To Generating Leads
Step Two: Menu
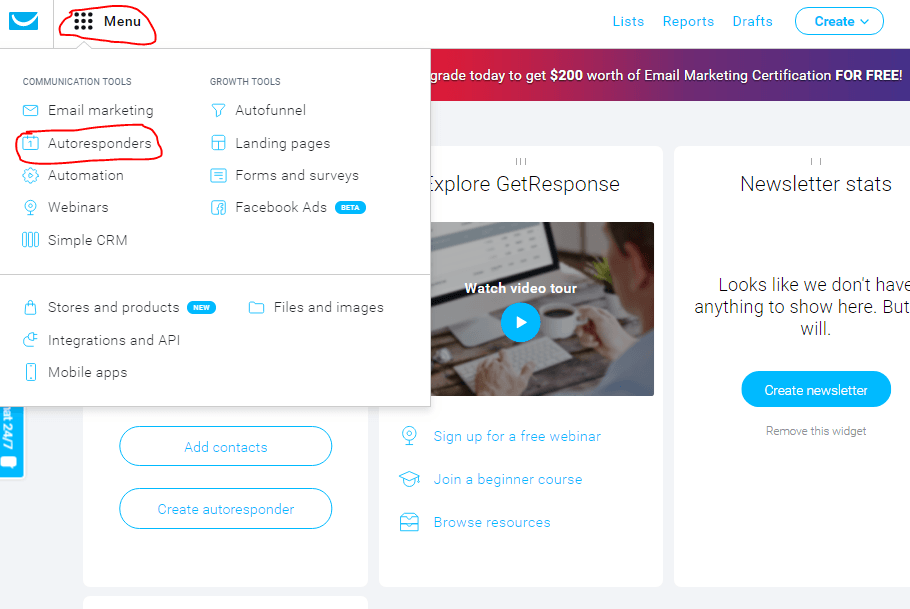
Click on the ‘Menu’ icon, then ‘autoresponder and ‘create autoresponder’
Step Three: Create Autoresponder
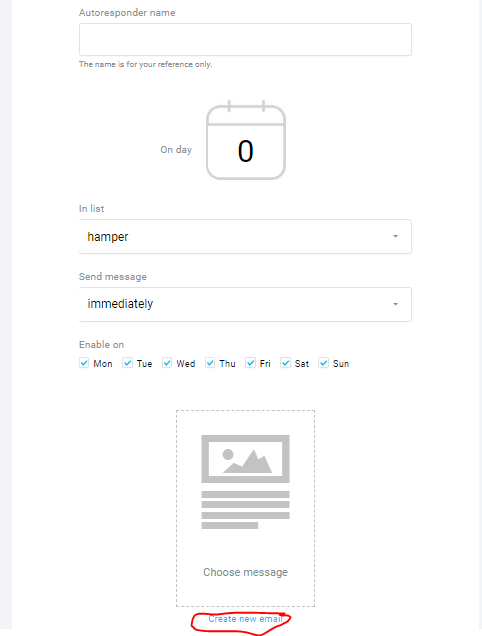
At this stage, there are a few points to note
- Autoresponder Name: This should be unique, as it makes it easier for you to differentiate between the autoresponders you have. It should be synonymous with the brand or product name for easy recall.
- On day: Should be set at day 0 (Zero) which should correspond with the cycle set in your landing page. The advantage of this is that it ensures people get your email on the same day they signed up and without delays.
- In List: Here, kindly choose the list for which you want the autoresponder attached to.
- Send Message: For the first email in this series, it’s important to leave it at ‘same time signed up’ which implies that people get the first email immediately after they opt in
- Enable on: This feature on your autoresponder should be used when you do not want this particular email going out on certain days of the week. In that case, simply uncheck the other days and leave the day(s) for which it should go out, checked.

Once this process has been completed, click on ‘create new email’
- Message Name: Again, your audience are not going to see this part of your email, yet the message name should be crafted from the name of the autoresponder and the position of the message in your email sequence
- Subject: Now, this is the first thing people see once an email comes from you. It goes a long way in determining the Open rate. It is advised that the subject line should make your audience very curious as to the content of your email. Once done, click on ‘Next Step’
READ ALSO: Tips on how to Convert Leads into Paying Customers with Email Marketing
 Step Four: Template
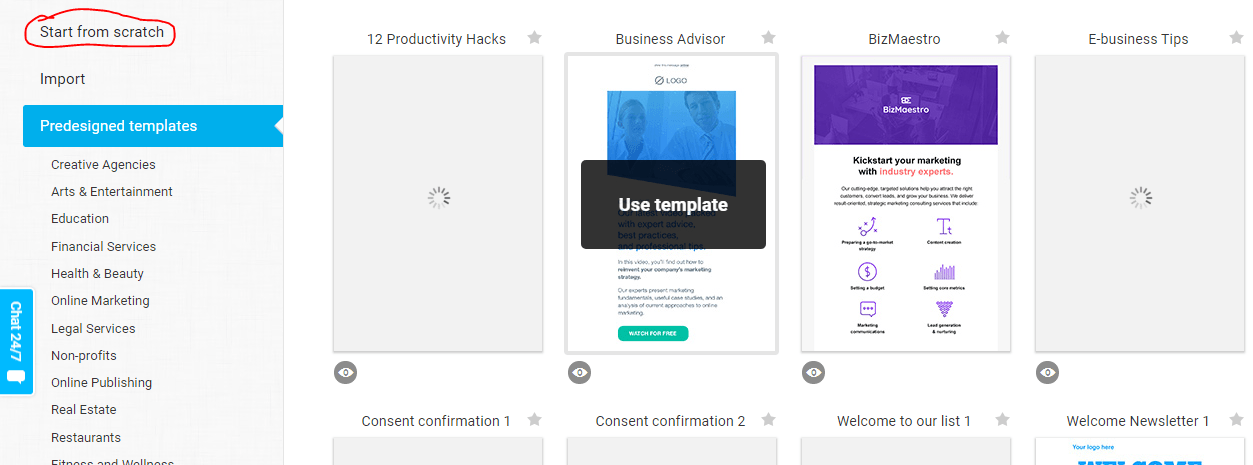
Most of the templates that can be seen are of bright colors with a number of wordings. It is vital to note that these templates are for promotional purposes which would most likely get your email in the ‘promotions’ or ‘spam’ folder.
To avoid this, click on ‘start from scratch’
Choose the column you want and begin to write your Email copy. After completing the process, click on ‘Next step’, then ‘save and ‘publish’
For subsequent days;
On day: From Day one and above, depending on your email sequence
Send Message: Seeing as the first message is to be delivered immediately, subsequent days should come with ‘a delay of’ the number of hours you wish to give between your emails.


