For every website, knowing how to create a sub-domain on WordPress is vital. The importance is that you can have different installations for several arms of the same business. Before starting, you should ensure that the sub-domain in question offer similar products/services to the main website.
That being said, You are to purchase a new domain, if the website is not similar to what you are doing currently. For instance, a clothing brand can create a sub-domain on WordPress if they seek to start a shoe brand. On the other hand, they must purchase a new domain if they are going into real estate or any other niche. I hope that is clear?
A subdomain is an additional name to a particular domain which comes first before a domain name and is used to differentiate between different aspects of a brand website.
How then do you create a new sub-domain?
READ ALSO: 30 Fast Ways To Increase Website Traffic For Free
Step One: Login to Control panel
Of course, there is only one place to do this, and that is from the back-end of your control panel. If you have forgotten, go to yoursite.com/cpanel, then enter the login details and you will be redirected to the cpanel.
From your cpanel, scroll down to the ‘domain’ section and click on ‘sub-domain’
Step Two: Choose Root domain
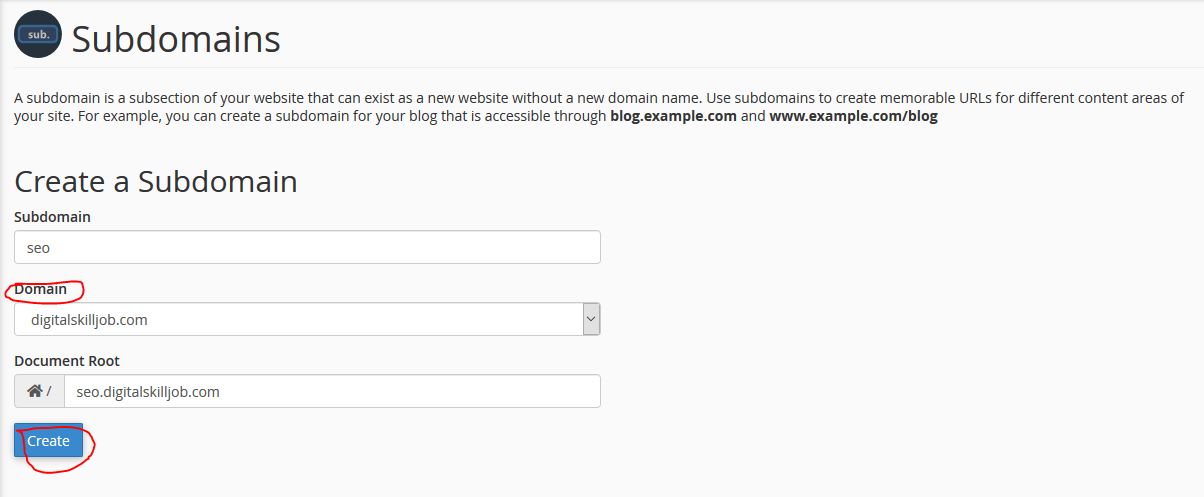
As you know by now, a sub-domain on WordPress must be tied to one domain only. First, enter the name of the sub-domain to be created. To ensure it is ted to the right domain, click on the ‘domain’ drop-down and choose the right one. This is only applicable if you have more than one website being hosted on the same plan.
Next, click on ‘create’ and Your new sub-domain on WordPress is ready.
What Next?
After successfully installing the sub-domain, the next step is to install WordPress on it, then go ahead to create, design and develop the pages. To know how to install WordPress, click here


