 Knowing how to create a shop on Facebook is an essential part of being on the business part of the social media platform.
To understand what you must do to achieve this, you should know a few advantages of creating this store.
- Display goods easily
- Attach prices of goods
- Add the right pictures to attract your audience
- Add a call to action button
Carrying out these tasks ensures that you can attract and close leads on Facebook without having to take them outside your page. To begin;
READ ALSO: How To Set Up A Facebook Business Manager And Ad Account
Step One: Choose the Facebook page
To create a shop on Facebook, it must be attached to an already existing business page as it cannot be operated from your normal profile. As has been said severally, the advantage of this is that you are able to separate your business from personal dealings on the platform by running a page.
Seeing as there might be multiple pages tied to your account, you are to choose the one to create a shop on, then begin the process
Step Two: Create Shop
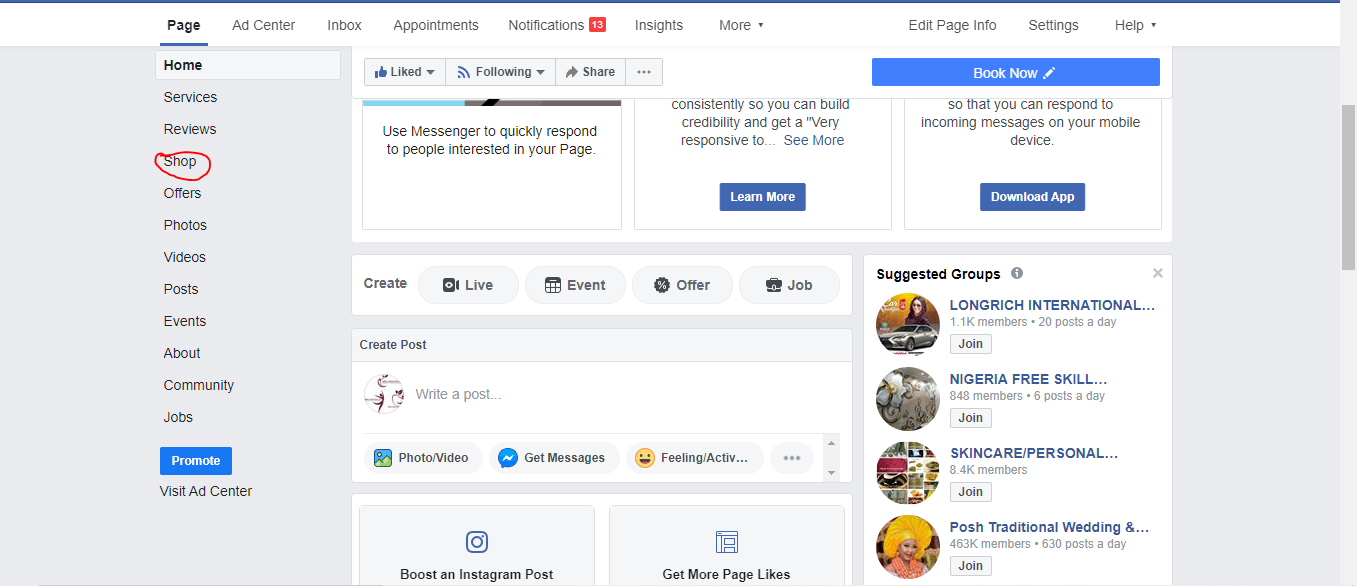
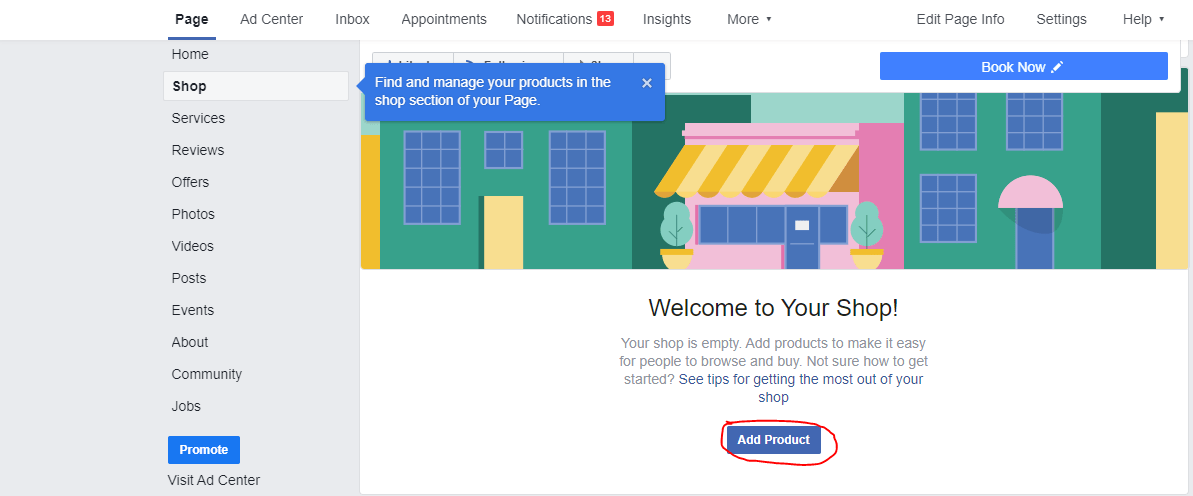
At this stage in trying to create a shop on Facebook, click on ‘shop’ from the drop-down menu on the page that was selected, then get ready to fill out the necessary details.
Next, agree to the merchant ‘terms and conditions’
READ ALSO: Effective Facebook Ads Creation: Traffic Campaign Objective
Step Three: Checkout Method
The two available options are;
Messages: Here, people get to click on the displayed products and send messages directly to you. It could come in form of questions or payment method, depending on how convinced they are.
To Another Website: For eCommerce store owners, this option allows you send people to a particular product page on your website. The advantage is that you must have added extra content on the product page which would help convert people more.
For this guide, I would choose the first option
Step Four: Choose Currency
If your business is predominant in one country with no plan to target foreigners, then The national currency should be used. If not, internationally accepted currencies like Dollars is advised.
Choose the preferred currency, then click on ‘save’
Step Five: Add Products
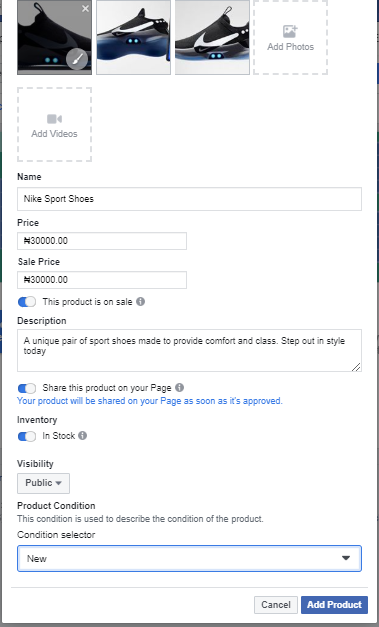
On getting to this stage, you are able to add the image(s) of the product, description, price, condition and availability.
Isn’t it so much better to have these details displayed? Trust me, these are some of the common questions you would expect from potential customers. It is always better to have these answers available to the public and increases the chances of sales conversion.
After providing the required details, you are to click on ‘Add Product’ after which Facebook would review and approve.


