A Facebook Page is akin to a brand’s online identity on the social media platform and gives your brand the professional outlook which is very important, while separating business from the owner.
Furthermore, a Facebook Page is one of the required criteria to be able to run paid Ads on the platform and gives followers a form to interact with your contact and stay updated on current happenings in your organization.
It is also possible to create a Facebook page for a person who is popular for the sole purpose of gaining followers and driving engagement. However, we shall focus on the business side of the discourse by learning how to create a Facebook Page for your Brand or Business.
Step One: Login
Log into your Facebook account via www.facebook.com. After logging in, click on ‘create’ at the top right corner of your profile and click on ‘page’. For the mobile app, click on the ‘hamburger icon from your timeline, scroll down to ‘pages’ then click on ‘create’
Step Two: objective
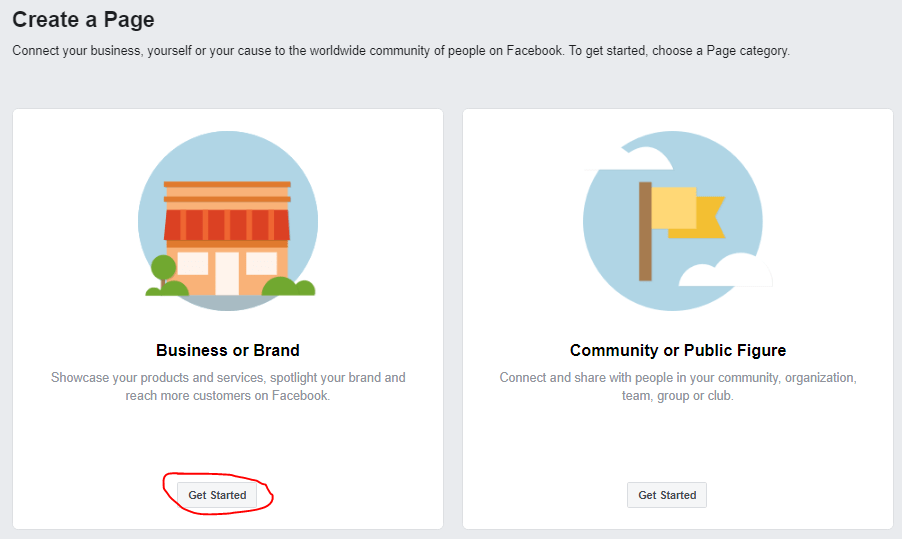
As stated earlier, your Facebook Page can either be for a business/brand or a Person. We also agreed to focus on the corporate side of things. Therefore, click on ‘get started’ on the first option which is business.
Step Three: Fill the details
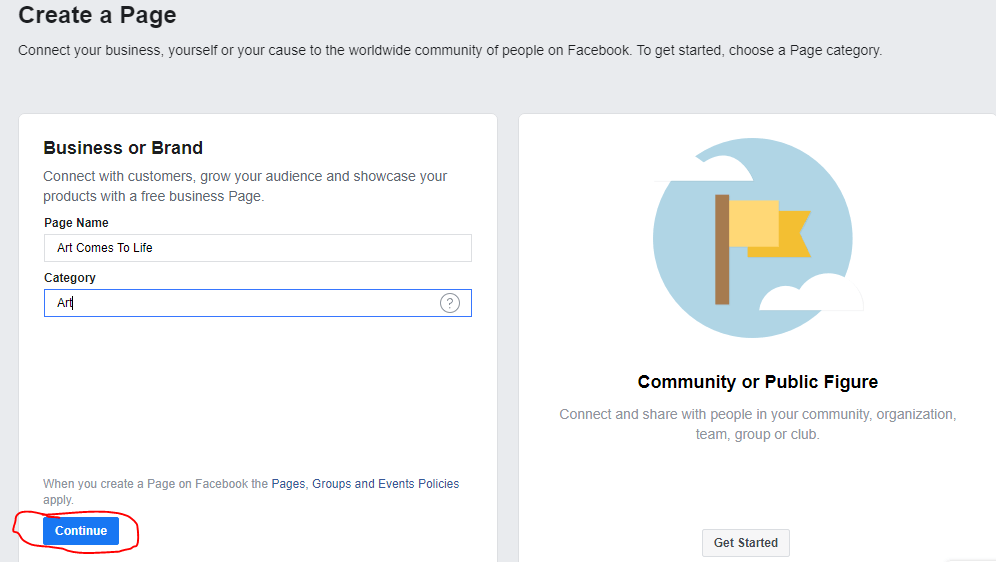
A form would be displayed, asking that you fill in the name and category which best suites your business. While these can be changed at a later time, it is important to fill in the correct details, as the process of changing the name on a Facebook Page can be quite tricky sometimes.
Once the required information has been correctly added, click on ‘continue’
Step Four: Images
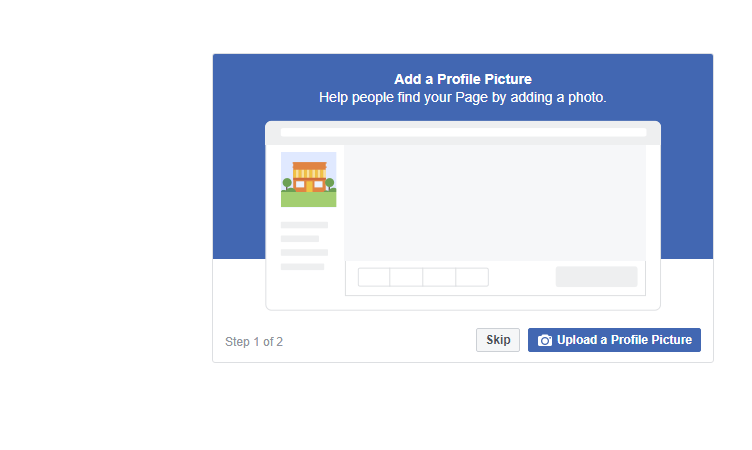
At this stage in your Facebook page creation, you are required to add a suitable profile picture and cover page. It is important to note that having these creatives in place does a lot in boosting your online credibility, as people are more inclined to engage with brands and businesses that have an identity online.
If there are no high quality images at the moment, you can skip this process but ensure to have them in place before any attempt at driving traffic to the page.
READ ALSO: Facebook Pixel Installation on a WordPress Website
Keep in mind, the profile picture should be a high quality logo of your business or brand while the cover photo should be a landscape image which depicts what your brand is all about.
Step Five: Additional Information
Congratulations, your Facebook page has been created and you are on step closer to running Ads on the platform.
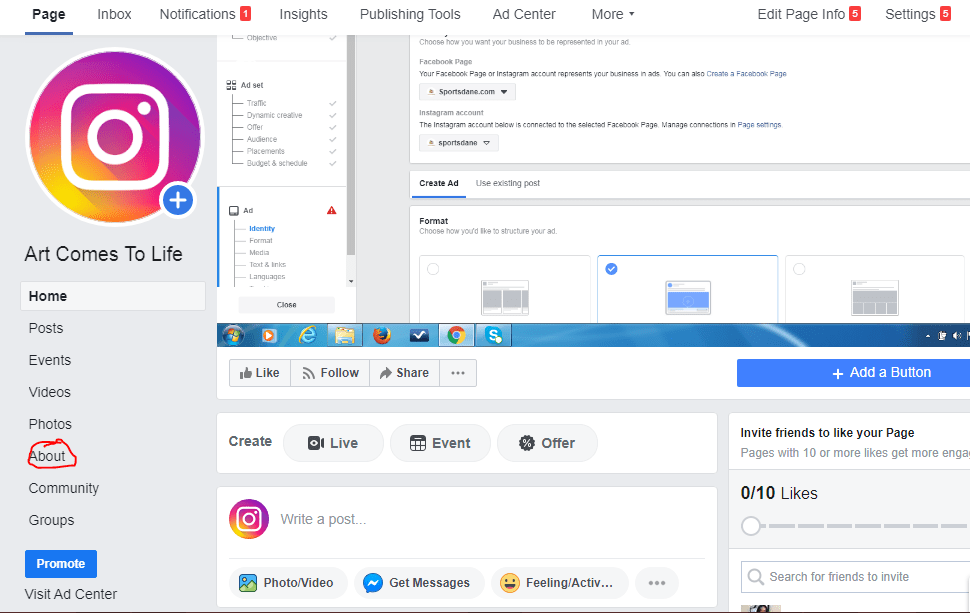
To better optimize you page, click the ‘see more’, then the ‘about’ button to add the following information;
- Page Username; A unique name that gives your page a friendly URL.
- Business type: An overview on whether your page is meant for a business or corporate office
- A phone number
- An email address
- Website, if you have one
- Add a Shop to your page; This allows you to manually add products which will be displayed on your page
- About: Here, you are to leave a short but precise description of what your brand or business is all about.
Do note that your Facebook Page would be better optimized when you are able to properly fill out the required information as it gives you more visibility of the platform and also sustains your online credibility.
