
Being able to reduce image size on WordPress is key to having a fast website. Before we begin the optimisation, run an SEO audit on seoptimer to know the sizes of files on Your site. Armed with this information, we can go ahead to optimise the images by using a plugin called smush.
Smush is what we call a freemium plugin, which means that it has both the free and premium packages. For the purpose of this guide, we shall take a look at the free version having in mind that it provides basic features needed to reduce image size on WordPress. You can always get an idea of what the pro version offers by clicking here
READ ALSO: How to setup HummingBird WordPress Plugin
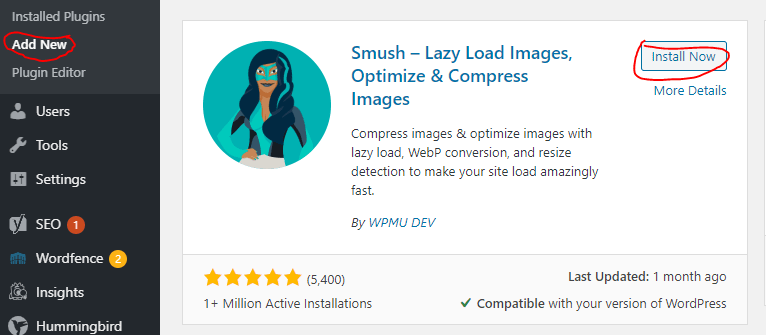
To begin, sign in to Your WordPress backend, scroll down to ‘plugins’ and click on ‘Add new’. Install and activate the smush plugin
Step two
Scroll down the left panel of wordpress and click on ‘dashboard’ under the smush icon. After doing that, go ahead to set up the plugin. Click on ‘Next’ a few times, then ‘finish setup’. All options have been truned on by default, so You do not have to tamper with the buttons
Once this has been done, the plugin would display the number of images that needs to be smushed ans You can click on ‘bulk smush now’
Since the free version is being used, only 50 images can be smushed at a time. On that note, the page has to be kept open so that the process can be resumed once it stops.
Smush is programmed to compress images automatically, yet it is advise You check back at intervals to see if there are images that needs to be compressed manually. You can find out by opening the smush dashboard and clicking on ‘re-check images’ After doing that, click on ‘bulk smush now’