Knowing how to setup the HummingBird WordPress plugin is a good achievement for the serious mind looking to increase website loading speed and decrease the delay in load time.
Welcome to learning how to install, activate, and setup the HummingBird WordPress Plugin.
Let’s get started..
HOW TO INSTALL THE HUMMINGBIRD WORDPRESS PLUGIN
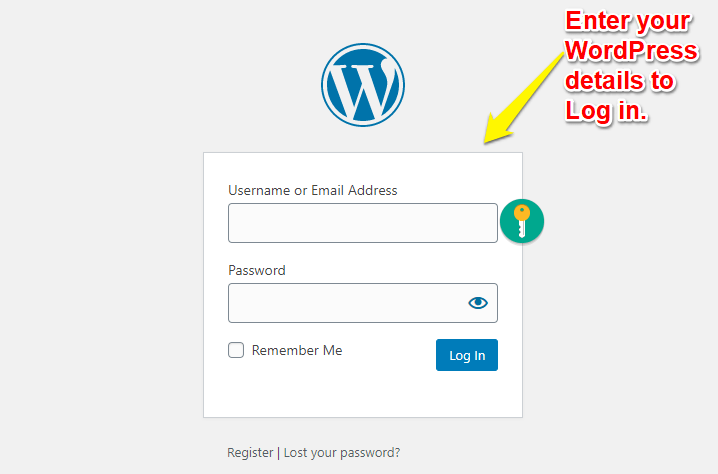
- Sign into your WordPress site (e.g digitalmarketingskill.com/wp-admin
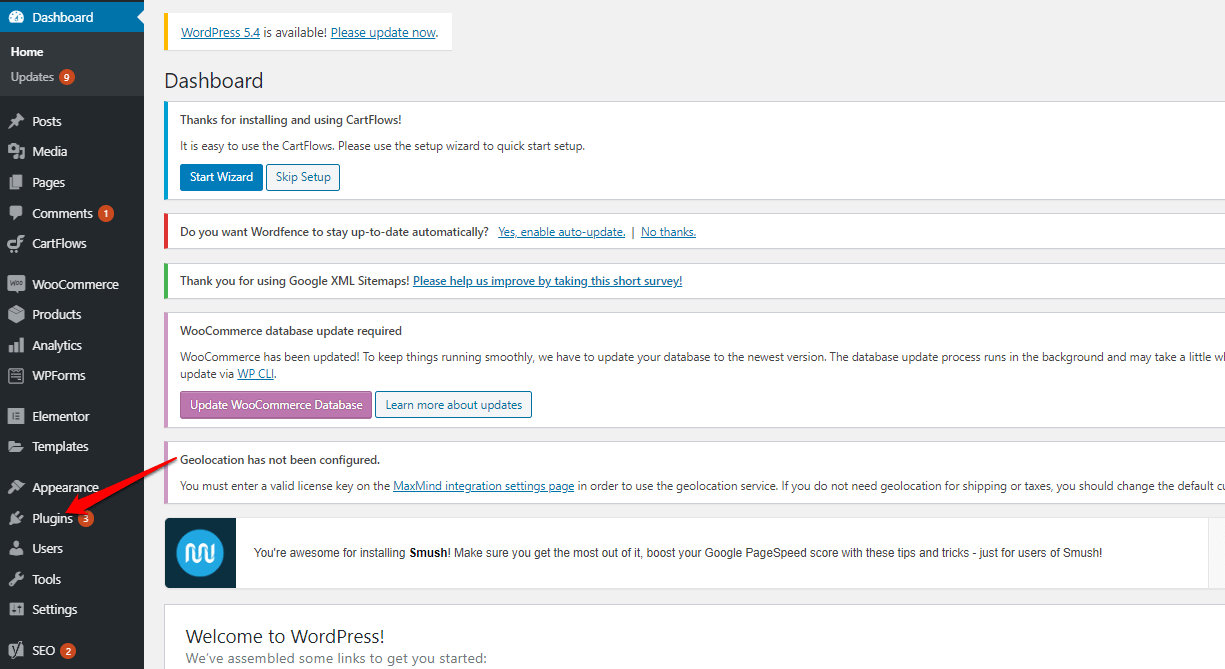
2. Click on Plugins; add new
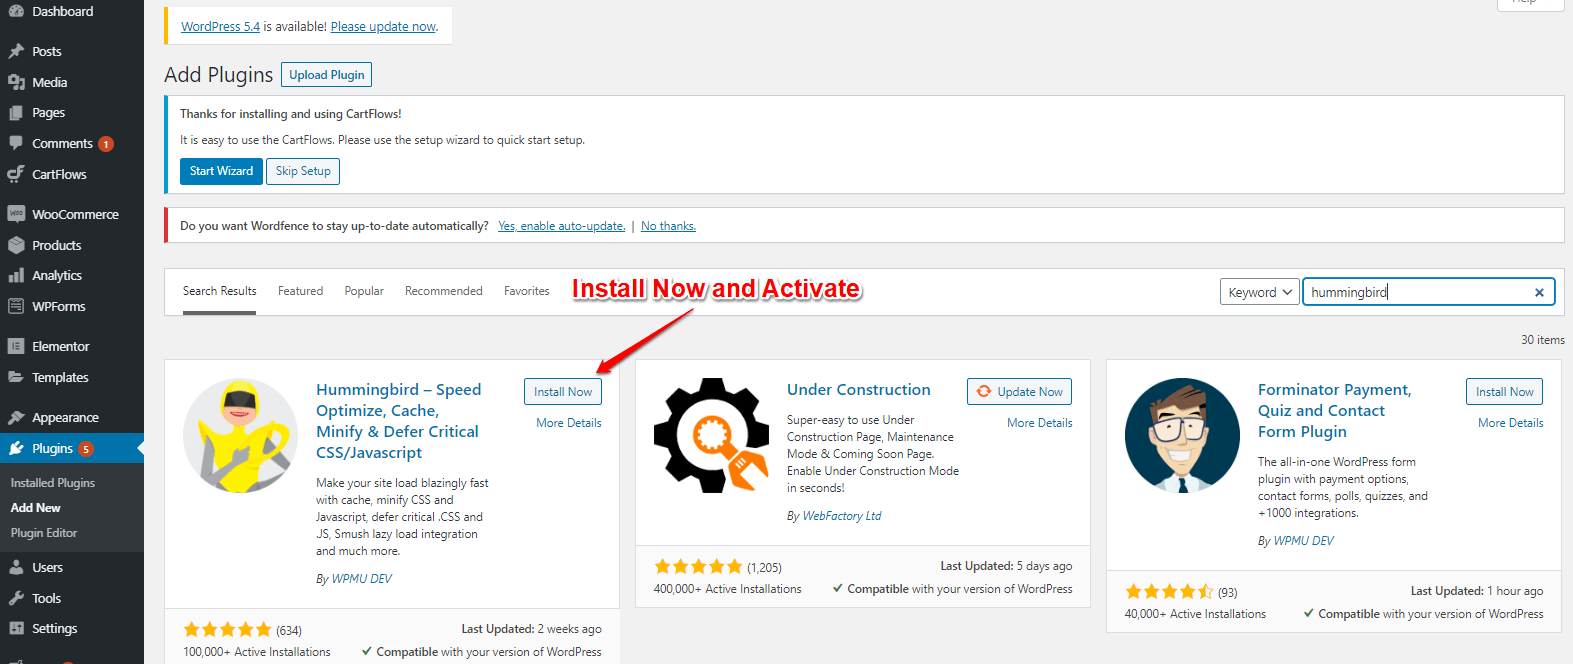
3. Search for HummingBird; Install and Activate
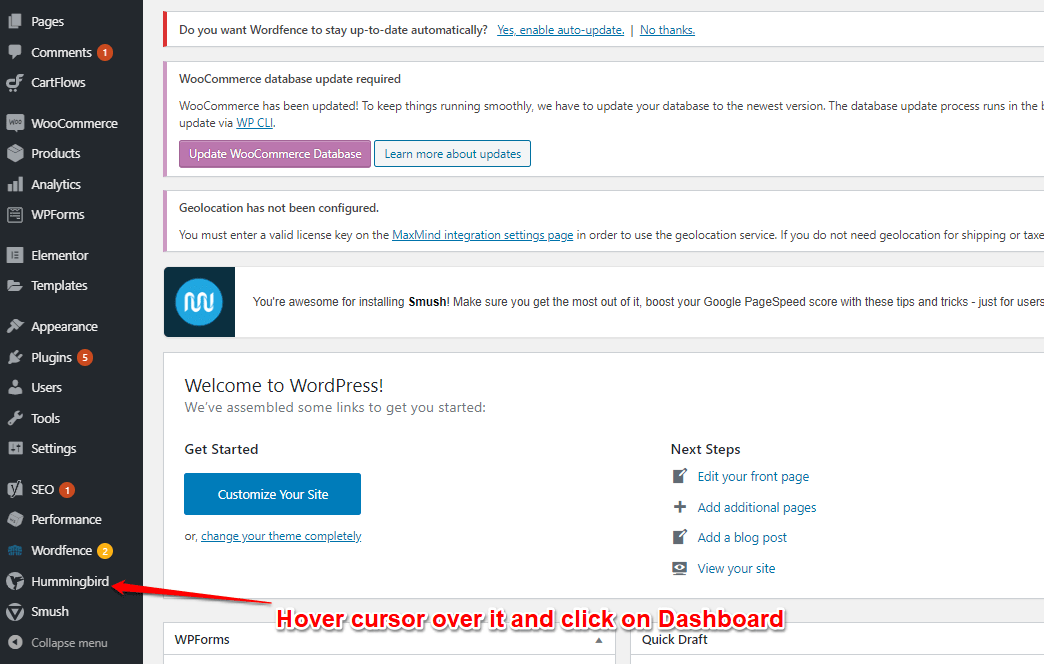
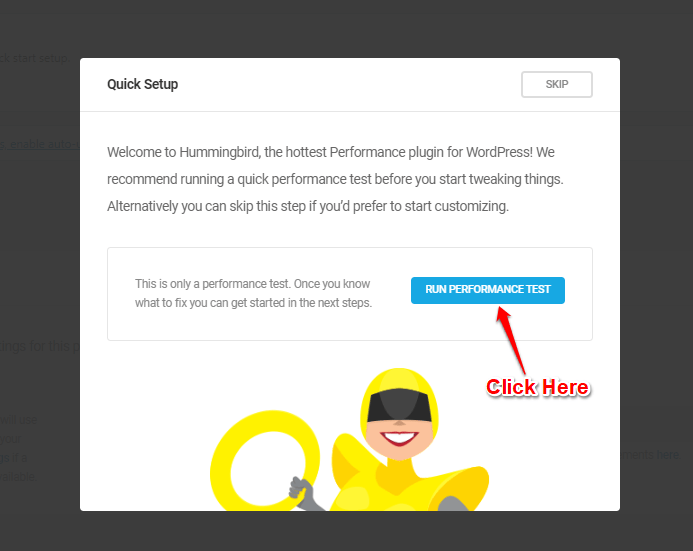
- Run the plugin
2. Run Performance Test ( First-time Installation)
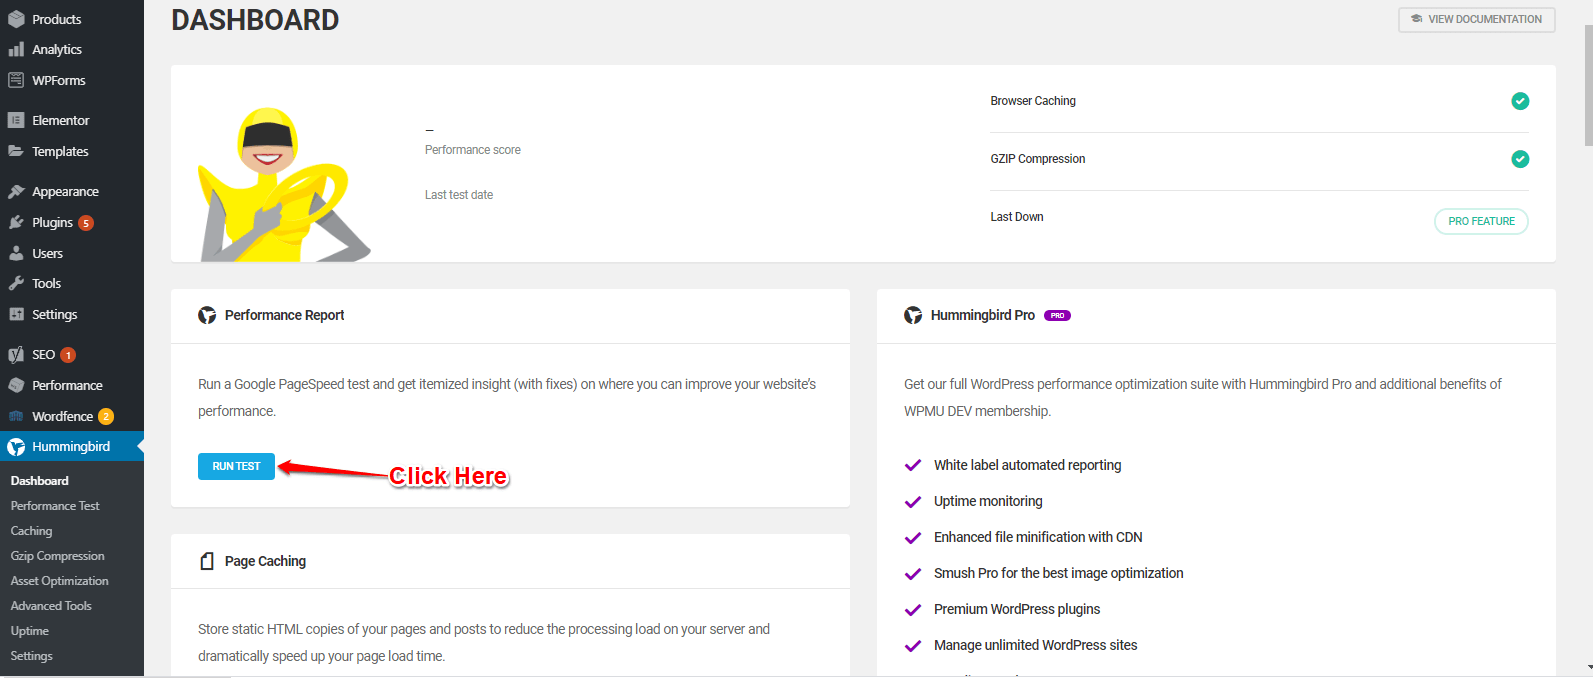
3. Or Run the Test on the Dashboard ( Another way incase of no popup)
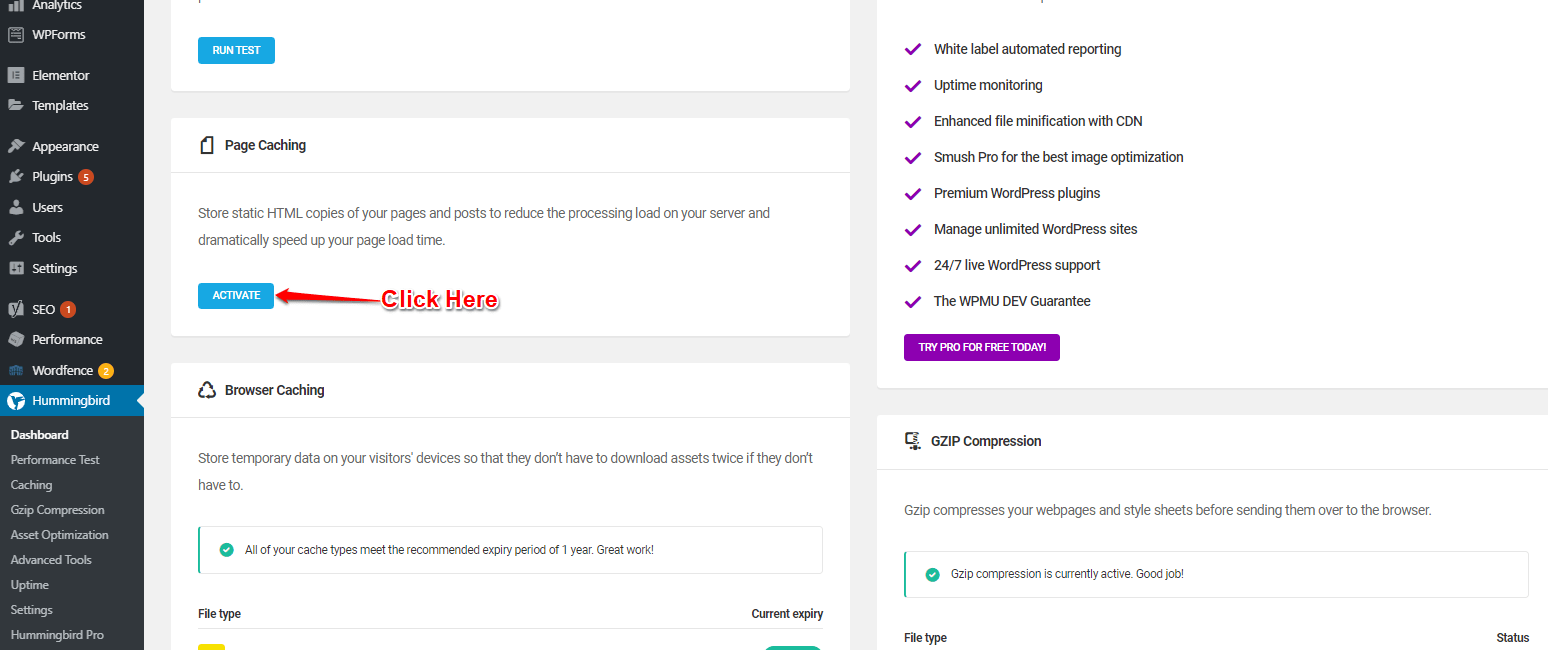
4. Continue with the Setup and Customizations
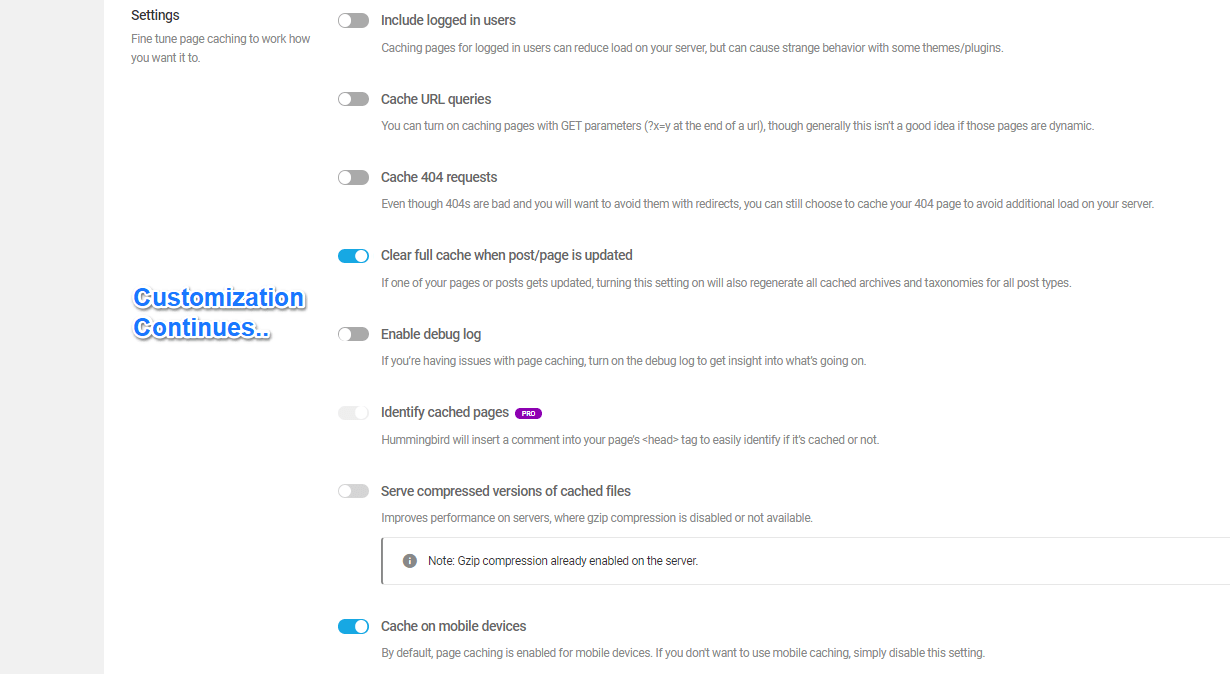
5. Customization continues
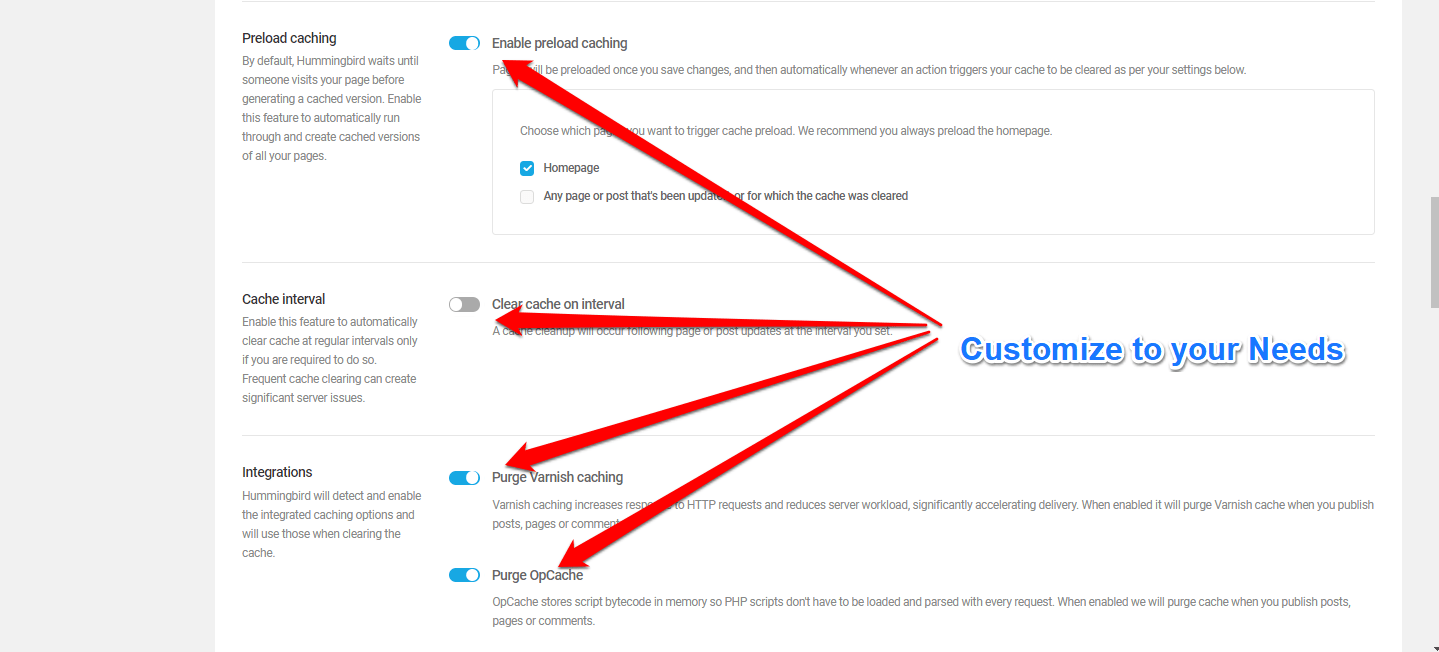
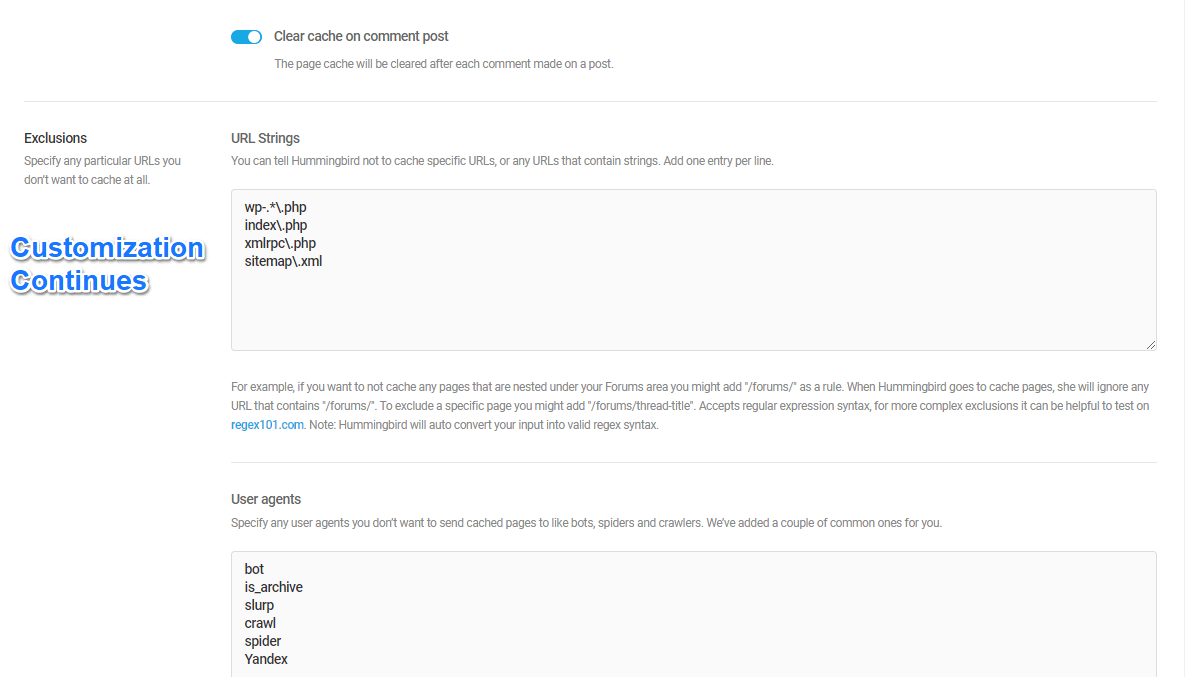
6. Customization continues..
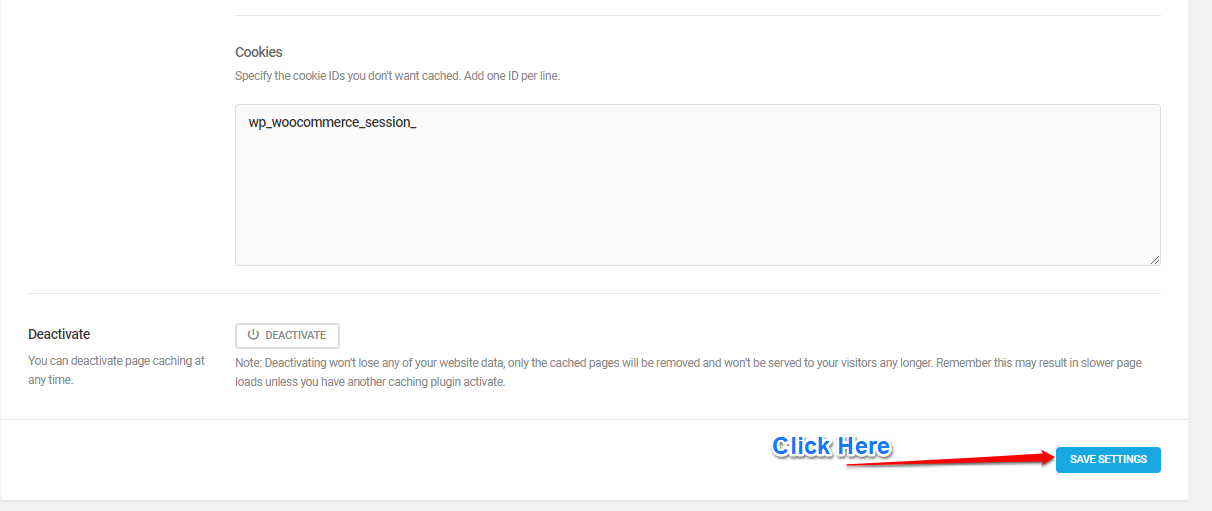
7. Customization Continues (follow the order)
8. Save the settings (Once you’re done)
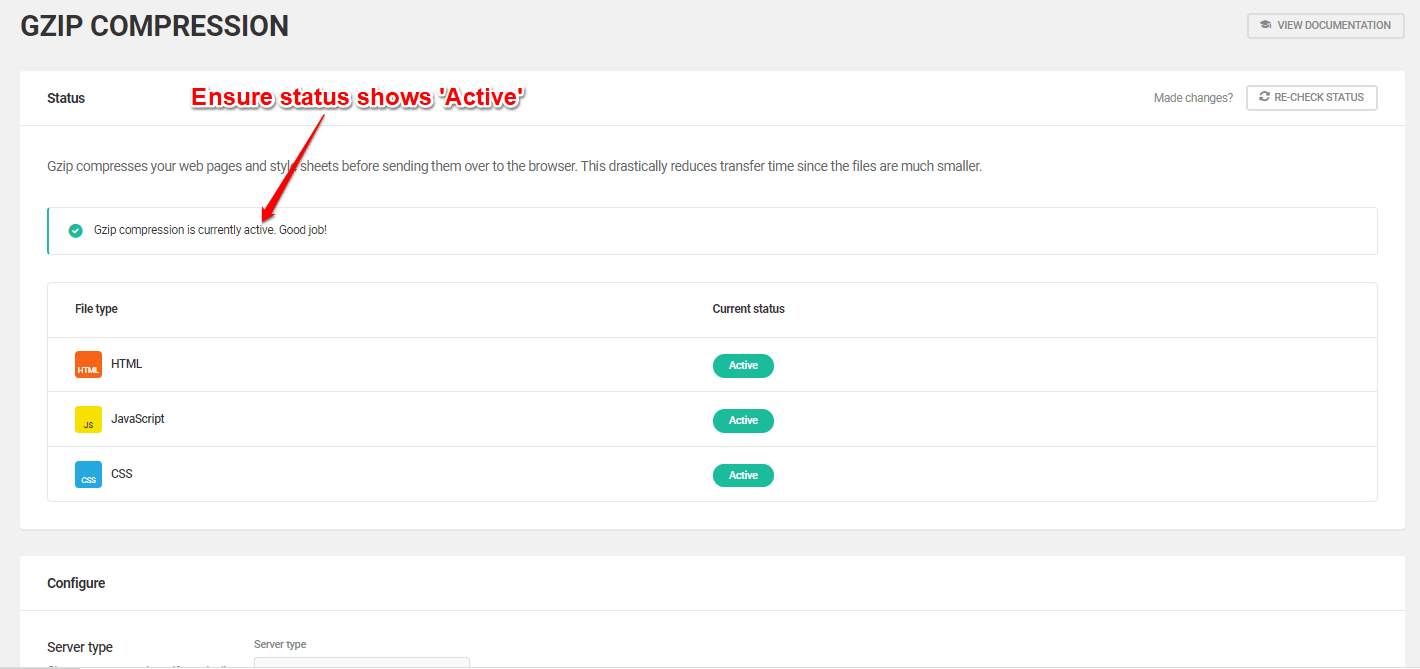
9. Activate GZIP Compression
Once you have completed the setup, the website loading speed would be very much improved.
Congratulations on having undertaken one of the few steps to ensuring that your website turns into an asset instead of a liability.
And more importantly, thank you for doing a good job 👍.