How to Install Google Analytics on a WordPress Website
Google Analytics is used to track the website activity of the users on a web page which may include; session duration, pages per session, bounce rate etc. along with the information on the source of the traffic.
It can be integrated with Google Ads, with which users can review online campaigns by tracking landing page quality and conversions (goals). Goals might include sales, lead generation, viewing a specific page, or downloading a particular file.
Google Analytics analysis can identify poorly performing pages with techniques such as funnel visualization, where visitors came from, how long they stayed on the website and their geographical position. It also provides more advanced features, including custom visitor segmentation.
To install this web analytics tool on your WordPress site, below are the steps
Step One: Get a Google Analytics account
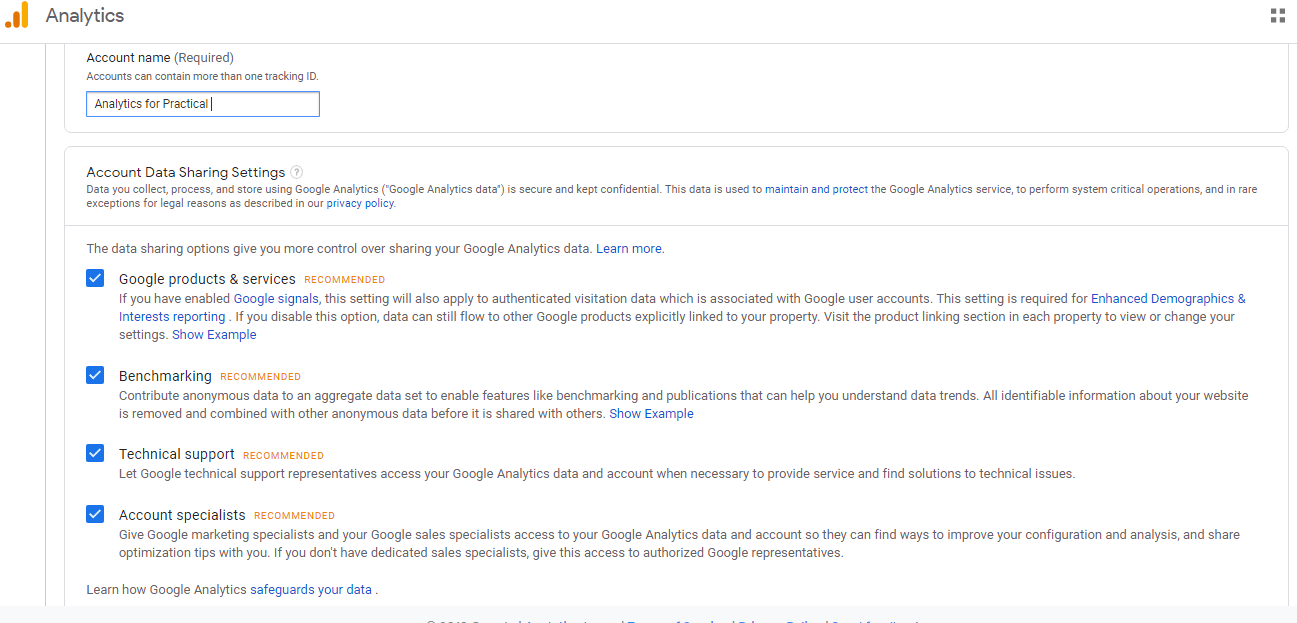
Go to www.analytics.google.com then click on ‘start measuring’ or ‘set up for free’, whichever appears on your screen. Give your account a name, leave the boxes checked then scroll down and click on ‘Next’
Step Two: What to Measure
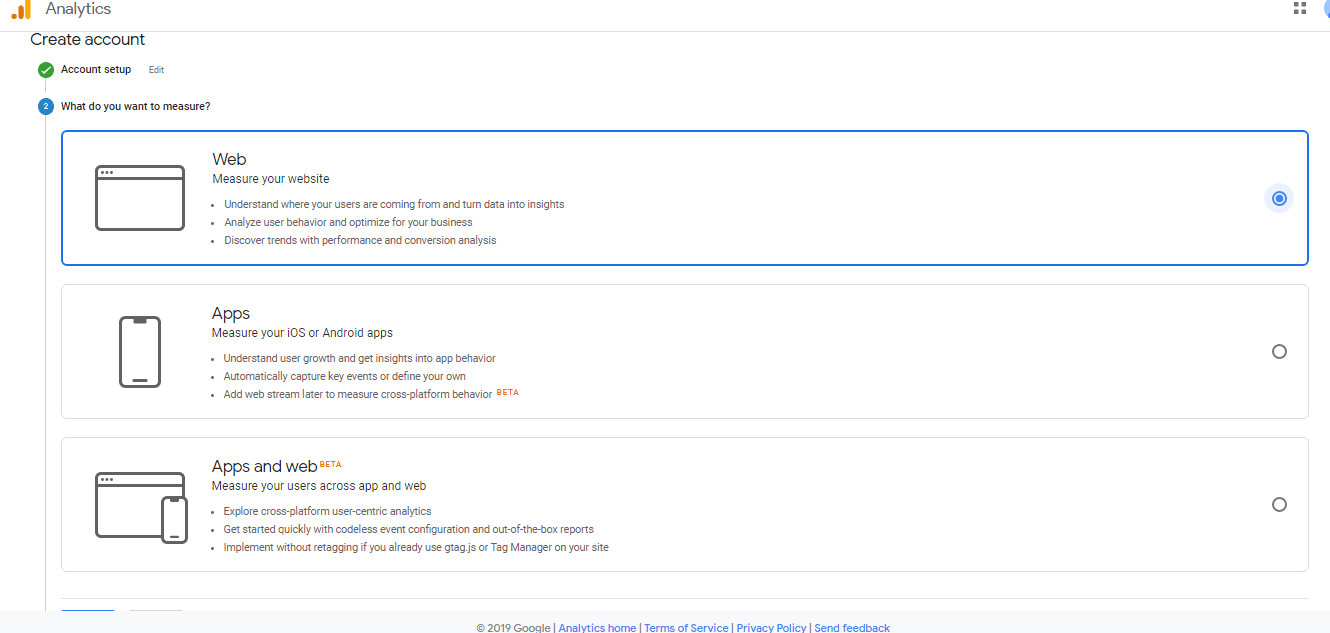
Since the focus is for Google Analytics to take record of activities on your site, the first option (web), takes care of this part of the setup, as choosing the other options might become problematic for what needs to be achieved with this. Scroll down and click on ‘Next’
Step Three: Property Setup
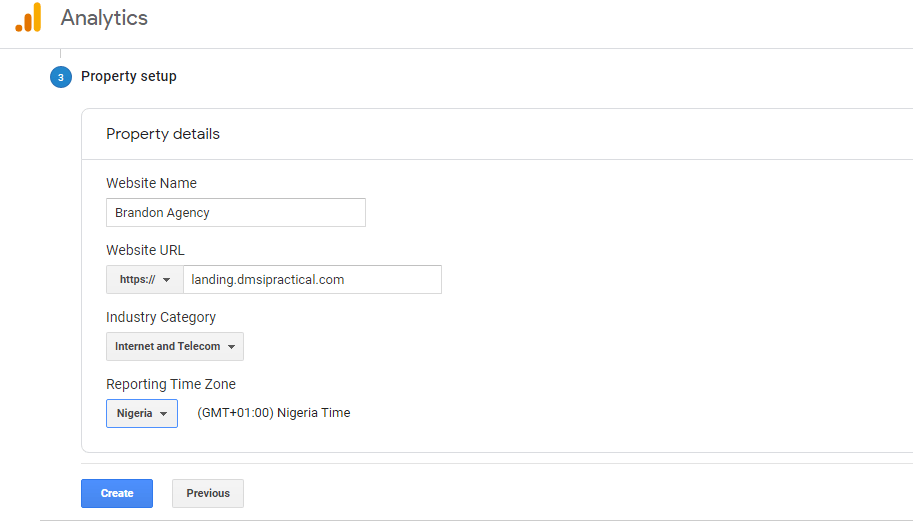
Here, you are to enter your site title or name, then the correct URL of your website, taking care to choose the correct protocol as either ‘http’ or ‘https’ depending on whether your site has SSL certificate or not.
Next, select the right industry which best suits your brand or ‘other’ if you find none, then select the time zone for your country of residence then click on ‘create’
Step Four: Terms and Conditions
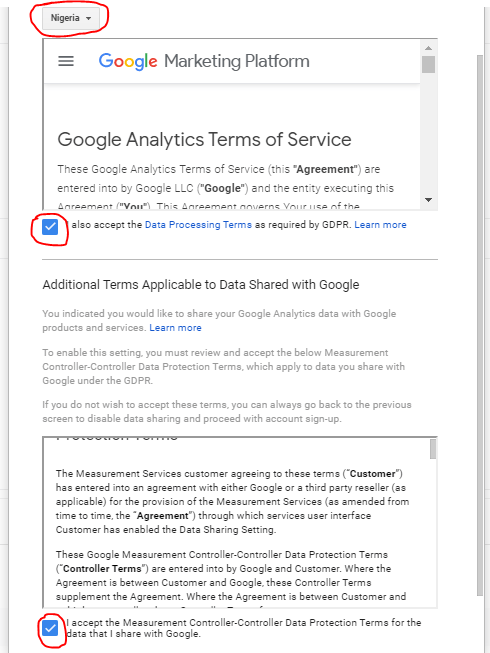
Simply agree to the terms and conditions for the installation of Google Analytics as stated, then choosing your country of residence, then scroll down and accept.
READ ALSO: Measuring Your Link Building ROI with Google Analytics
Step Five: Install and Activate on WordPress
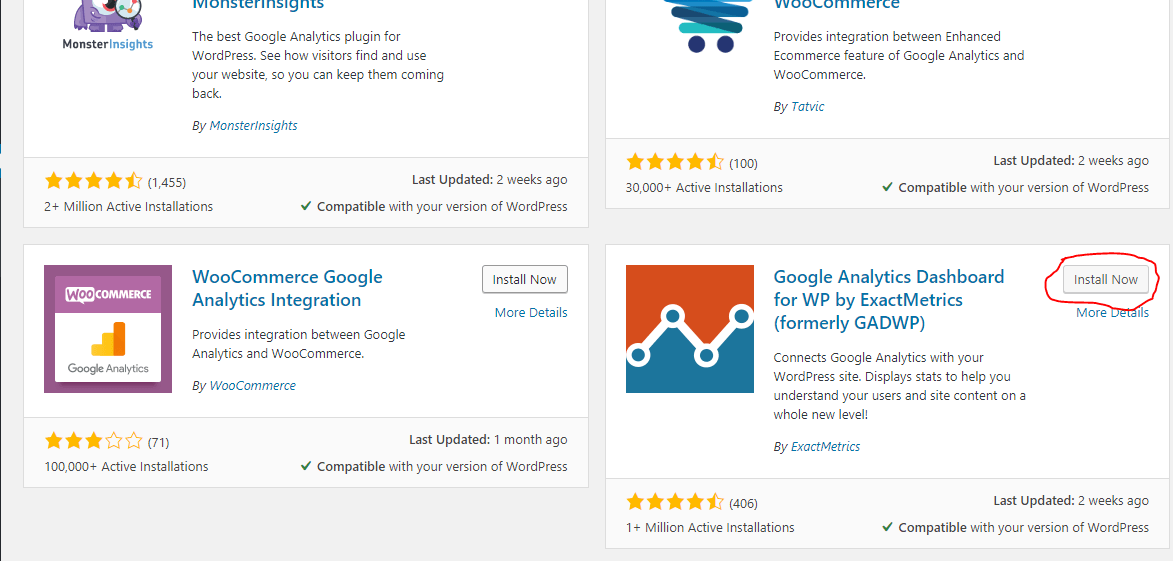
At this stage of your Google Analytics installation, you are to log into your WordPress backend and scroll to the plugin section, then click on ‘Add new’. Search for ‘Google Analytics Dashboard for WordPress’, install and activate.
Step Six: Authorize plugin
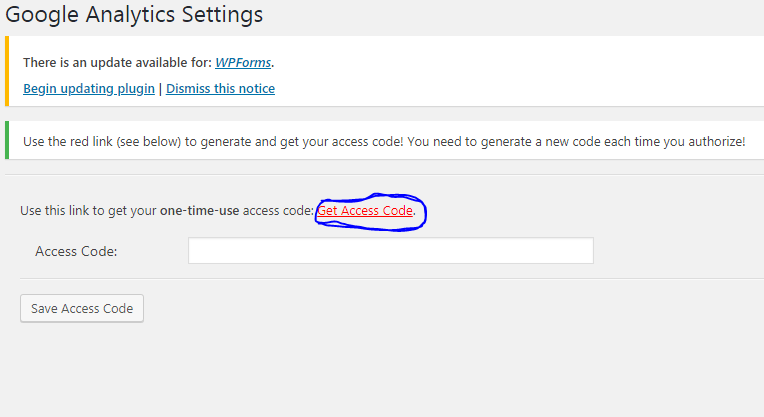
Once the Google Analytic plugin has been installed, you are to click on ‘settings’, then ‘authorize plugin’. The next prompt should be ‘Get Access code’. Click on it and sign in with the Gmail address used to open an account on Google Analytics.
Next is to allow your email access to generate the code, then copy the access code displayed and paste on your WordPress backend then click on ‘save access code’
After doing that, scroll down and click on ‘save changes’
Step Seven: Check Integration
After successfully completing this process for Google Analytics, leave the tab open and visit your site from a new tab. Once there, come back to your analytics dashboard and click on the home icon to see the image below
This shows that the tool has begun to record traffic on your site.

