For a number of reasons, Facebook Pixel is an integral part of retargeting for Ads on the platform. Apart from fetching relevant data on the flow of traffic on your website, it helps you narrow down the most optimized web pages to give you an idea on how to properly retarget an audience that has interacted with your brand at one time or the other.
What is Facebook Pixel?
Simply put, it is a bunch of JavaScript codes that can be embedded on your site to help you track the influx of people on the site and enable this data to be used in running retargeting ads on Facebook. How then do you install it?
READ ALSO: How to build a WordPress website or blog in Nigeria (2019)
Step One: Log in
Go to your business Manager account via www.facebook.com/businessmanager. Once in, search for ‘Pixels’ or ‘Events Manager’ and click on it to start the Facebook Pixel creation process.
Step Two: Data Source
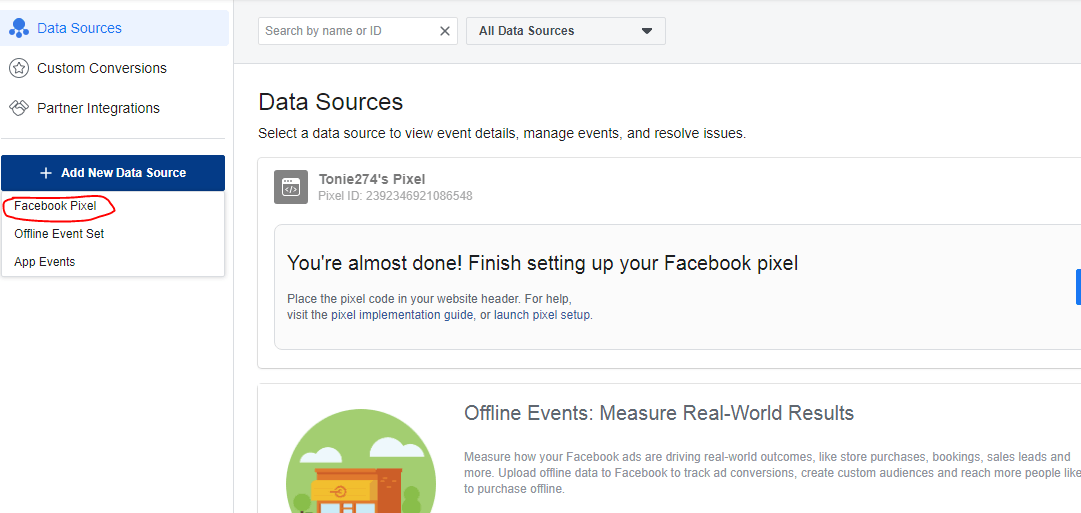
Click on ‘Add new data source’ and select ‘Facebook Pixel’. Give your pixel a name and enter your website URL in the boxes as provided.
Step Three: Choose partner Integration
To continue setting up your Facebook Pixel, kindly click on ‘add code using partner integration’. This would allow you choose WordPress as the content management system and properly integrate the pixel to your site. Scroll down and select ‘WordPress’
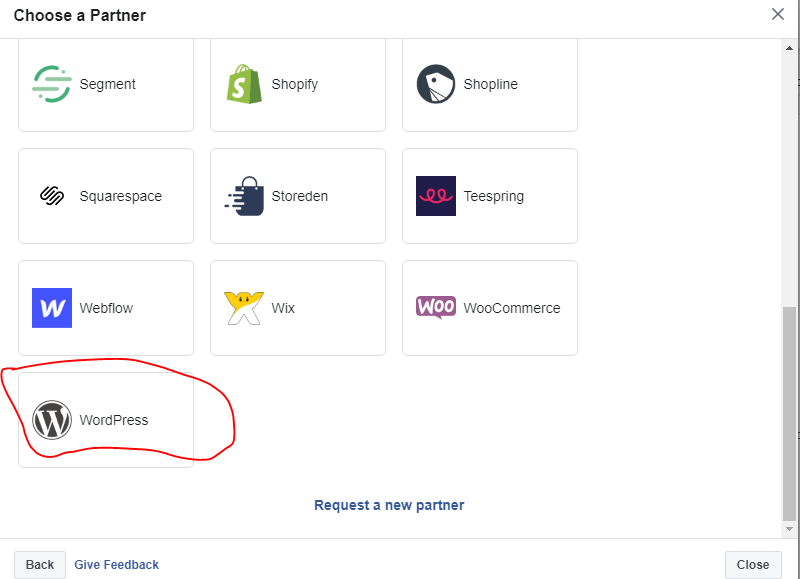
Afterwards, click on ‘next’ to enable you download the plugin
READ ALSO: Factors that lead to poor Performance of Facebook Ads
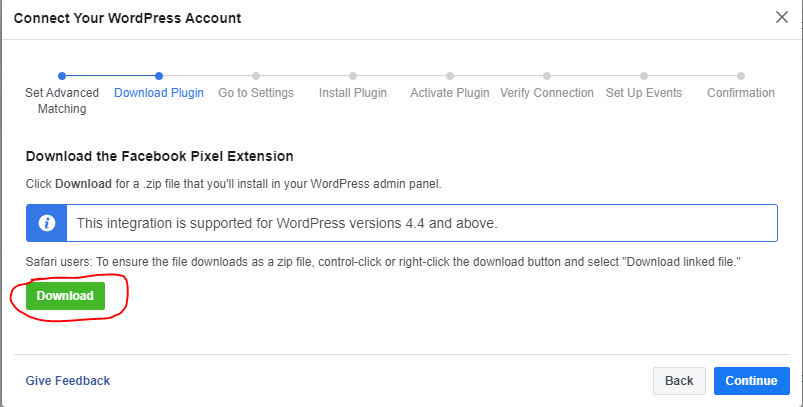
Step Four: Plugin Download
To proceed with setting up your Facebook Pixel for WordPress, kindly click on ‘download’ to get the required plugin and proceed to the next step.
Step Five: Upload to WordPress and Install
Sign in to your WordPress backend and under plugin, click on ‘add new’, then ‘upload plugin’. Search for the Facebook pixel plugin you just downloaded in your ‘download’ folder or simply drag and drop.
Step Six: Install and Activate Plugin
After uploading the Facebook, click on the’ install button for the process to be completed. The next step is to activate the plugin to properly work with WordPress. We aren’t done just yet.
Step Seven: Continue
The next steps as seen on your Facebook pixel setup dashboard would seek to educate you on how to successfully upload, install and activate the plugin but we have done that already, haven’t we?
So, click on ‘continue’ till you get to ‘verify connection’. At this stage, you would be required to enter your website URL to test the connection. Once the web address has been entered, click on ‘send test traffic’ and it should lead you to the homepage of your site.
![]()
After completing this process, you should see the ‘active’ sign to indicate that the Facebook pixel you just created has been successfully installed on your site and should start generating data immediately.